SENSOR EVENTS
Posted by 1 1 onSensor Events
After connecting a sensor to a device via an M5stack or M5stick, you can send a configuration through the “Home” menu by right clicking on a “Screen” or “Screen group”, “Manage”, “Set”, “Set sensor config”. Example JSON files will be uploaded our knowledge base.
In this config file, you can set up exactly which values will be sent to your content when an event happens. For example, you can connect a sensor with two buttons and set their press down values to “prev” and “next”.
There is a two-way communication between “Contents” and “Sensors”. Event handlers can be set for both of them in “Contents”.
Create and open a “Content”, add some “Pages”, then select “EDIT SENSOR EVENTS” in the “Page” section of the left-hand menu.

Input actions
We call everything an “input event”, when something happens to a sensor (a button is pressed, someone walks in front of a motion sensor, etc), and sends a value to the content. “Input actions” will be executed when their conditions match an input event.
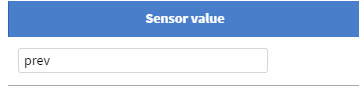
Click “Add value” to add a new row. Right now, only a couple of options are visible. As condition, we can specify a “Sensor value” (in our example, “prev” or “next”).

When a content receives a “Sensor value”, it will check the “Page wide actions” from top to bottom, then the “Content wide actions” from top to bottom.
If any of them fulfills the condition, the corresponding action will be executed.
If an executed action was “Final”, any action that comes after this one, will be ignored. If it is not “Final” and more “Action’s” conditions are fulfilled, more “Actions” can be executed for that event.
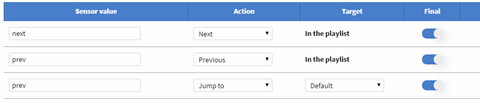
In this case, on receiving “prev”, the first “Action” won’t match the input, so will be ignored. The second “Action’s” condition is fulfilled, so the “Content” will jump to the previous “Page”. The third “Action” will be ignored, because the second one got executed and is “Final”, even though it would have matched.
Content wide input action
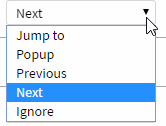
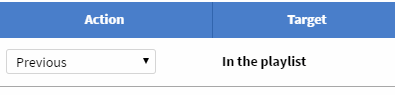
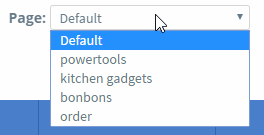
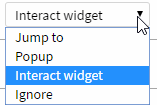
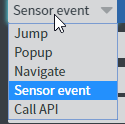
After selecting “Jump to”, or “Popup” you need to specify the “Target page”, which is a “Page” of the current “Content”. If a “Popup action” is executed and there is an open popup already, it will be closed. “Popups” open in almost full screen and won’t close until some other interaction closes them.

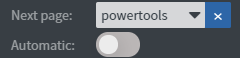
With “Previous” and “Next”, the targets aren’t set here. If the current “Page” has a “Next page” set either by hand or through the playlist editor, the ”Next” action will navigate to that. The ”Previous” will work in the ”Playlist” or try to go backwards in ”Page history”. In most cases, you want to turn off the “Automatic” option in the “Playlist editor” or in the left-hand menu.


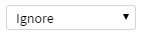
The “Ignore” option’s purpose is to use in combination with “Final” to stop some values from activating the different types of “Fallback actions”
Page wide input actions
The window will open with the current “Page” selected, but you can choose any other “Page” as well. It is possible to modify multiple “Pages” then “Save” only once.
The “Page wide actions” have a different set of options compared to “Content wide actions”.
Navigation
“Jump to”, “Popup” and “Ignore” work the same way. If you need “Previous” or “Next” on a specific page, just use “Jump to” with the correct target.
Widget interaction
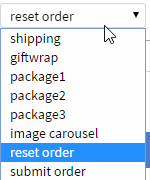
After selecting “Interact widget”, the “Target” field will show all the eligible widgets from the current “Page”. Some of them also have special options. The displayed widget name can be set both in the left-hand menu or in the “Layers” menu.

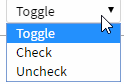
- A “Checkbox” can be toggled, always checked or always unchecked. If you have one event (such as a button press) to interact with a “Checkbox”, use toggle. If multiple events can influence the value, “Check” and “Uncheck” for separate “Actions” can come in handy.
- A “Radio button” can be checked. Checking and unchecking other “Radio buttons” in the same “Button group” will happen normally; any other “Radio button” in the same group will be checked or unchecked, depending on whether their “Checked event value” and “Event name” equals this one’s.
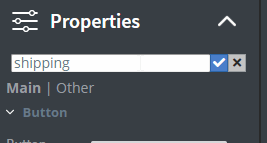
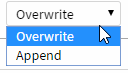
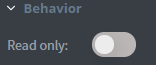
- For “User input”, you can either choose “Overwrite” or “Append”. Most of the time you want to turn on “Read only” in the widget “Properties” menu.
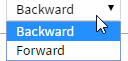
- “Carousels” can be flipped through “Backward” or “Forward”.
- “Reset button” and “Submit button” work as if they were clicked by the user.
Show/hide widgets
Any type of widget can be choosen as target. Available optins are: show, hide and toggle.
Output actions
We call everything an “Output event” when a “Content” sends a value towards a “Sensor”. Output sensors such as relays and printers can react to these.
Content wide output actions
Output events can be sent on every “Page” start and every “Page” end.
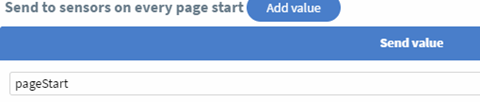
If multiple values are set, all of them will be sent out individually.
Page wide output actions
“Page wide output actions” are triggered when the specific “Page” starts or ends. If there are both “Page wide” and “Content wide” output actions, they will all be sent individually, starting with the “Page wide actions”.
Widget interaction
“Page wide page end actions” can either send out a static text or an interactive widget’s value.

The available widgets are “Checkbox”, “Radio button” and “User input”.
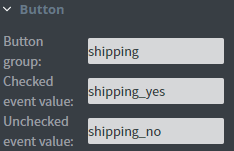
By choosing any “Radio button” in a “Button group”, the group’s selected “Checked event value” will be sent instead of the individual “Radio button’s” value. For “Checkboxes”, either the “Checked event value” or the “Unchecked event value” will be sent.
On click
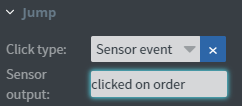
If your device has touch screen, you can also set the touch event for “Text”, “Image” and “Shape” widgets to send out sensor events. This will be sent out once per touch event.
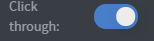
Tip: If you need a bigger area to be touch sensitive but would like to use a small text in the middle, add an “Image” or “Shape” below it and use the “Click through” option on your small widget. It can usually be found in the “More” section of the “Other” tab.

Submit button
Submit buttons always log into a database and this data can be downloaded through the “Home” menu for each “Content” individually. Next to logging, they can do another action: send an e-mail, send an output sensor event or call an API. After collecting the data from all interactive widgets in the entire “Content”, the widgets will be reset to their original values
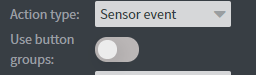
If the “Use button groups” option is not set, a ‘flat’ object will be sent as “Sensor event value” or API call request body, “Interaction event name” used as key. If “Use button groups” is set, all of these will be wrapped into individual “Button groups”.
It will also work if it is activated through an “Input sensor action”.
Datasource event
“Output sensor events” can also be sent as an action reacting to a “Datasource event”. More details can be found below in its own section.Oldaltörés
Behavior
Below the “Input sensor actions”, you can find even more options.
Fallback

In case none of the “Page wide” or “Content wide” actions matched the “Sensor event”, the “Fallback action” will be executed.

Tip: For some sensors, it is important to either disable some insignificant actions in the config file or add them up as “Ignore” actions, so they won’t trigger the “Fallback” when they shouldn’t have. For example, some button sensors can send both key down and key up events and we usually only care about one of those.
Sender
After turning on “Allow handling senders, not just values”, a “Sender” column will appear in the “Input actions” tables.


If you leave the “Sender” field blank, everything will work the same as before. If both the “Sender” and “Sensor value” are filled out for an “Action”, it will only be executed if the given sensor sent the given value. If only the “Sender” is filled out, any value sent by that sensor will fulfill the condition.
It can be useful in combination with an RFID sensor.
Final

If an action is not “Final”, it won’t stop other actions from getting executed, even if it is a match. For example, it is possible to toggle a checkbox and navigate to another page. However, the “Fallback” will only be triggered in case none of the actions has been executed, regardless of their “Final” status.
You can change the order of actions with the arrow buttons.

Wait for page end
If “Allow turning on wait for page end option for events” is turned on, another column will appear in the “Content wide input actions” table.

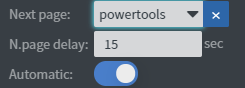
If it is turned on, the navigation actions (“Jump to”, “Previous”, “Next”) won’t always happen instantly. Instead, if the current page has a “Next page”, a “Next page delay” and is set to “Automatic”, it will wait for the remaining seconds and will jump to the “Page” selected in the “Sensor action” instead of its original “Next page”. It can be useful if you are displaying videos and don’t want your “Content” to jump before its end.
Send as data row
“Send value as bound data row label” can only be turned on if the content has a valid “Base data binding” and “Change based on data row label…” is enabled. The values will be sent out with navigation and “Popup” actions as “Bound data row”. If the value is found in the “Label position”, the corresponding “Data row” will be used instead of the original one. Best used in combination with an action that only specifies the “Sender” and accepts any “Sensor values”. RFID and similar sensors can help build powerful contents with this option.

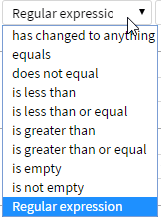
Regular expressions Since v1.6
If you turn on “Use regular expressions for values” in the “Content wide sensor events” window, the “Sensor value” field value will be treated as a regular expression for both “Content wide” and “Page wide” events.
Read more: https://developer.mozilla.org/en-US/docs/Web/JavaScript/Guide/Regular_Expressions
Regular expressions can be enabled for an “Api response event” the same way.
For “Datasource events”, this option is available event-by-event, as it is a chosable “Evaluation type”.